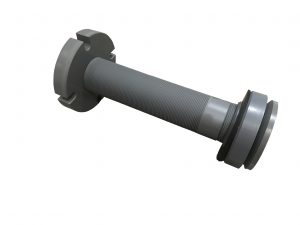
How do I change the center feed assembly on my filter press?
If the filter press is leaking (around the locknut on the 470mm size or from the bottom leg drain holes on 630mm and larger size presses) during the start-up of the feed process, the problem is usually leakage past the center feed quad ring seal. The quad ring may not seal for several reasons.
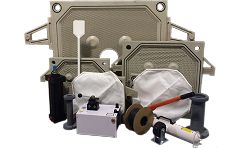
Please follow the instructions outlined below. If you need help installing or you need to order a center feed pipe assembly, please contact us at 216-881-7900 or info@metchem.com
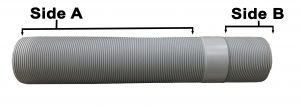
Step 1) Test Fit the Pipe and Clip Nut Seat Position
In the orientation shown in the photo below, with the rim of the Clip Nut Seat Starting onto the Center Feed Pipe, temporally install the Gasket and the Clip Nut Seat onto the “B” side of the Center feed Pipe with approximately one inch of the pipe extending beyond the back side of the clip nut seat.
Place the assembly into the filter press plate.
Install the clip nut onto the end of side “B” the center feed pipe, behind the Clip Nut Seat as shown in the picture below.
Adjust both nuts so that they are together and the “B” side of the center feed pipe protrudes only the thickness of the cloth, not yet installed, beyond the flat side of the Clip Nut.
Once the pipe is in though the filter press head plate steel frame, ensure that the Center Feed Pipe has sufficient threads to install the Locking Nut onto side “A” and then tighten down against the steel frame.
Wrong Way
This photo illustrates an assembly that does not have enough threads.
Correct Way
This photo illustrates the Center Feed Pipe re-adjusted to the Clip Nut and Clip Nut Seat, so that threads of the “B” side of the Center Feed Pipe now protrude too far past the Clip Nut and must be trimmed. The GOAL of moving the “A” side into the frame of the filter press so that the Lock Nut can now tighten the assembly has be accomplished.
Step 2) Glue The Clip Nut Seat
Re-install the Clip Nut Seat on to the “B” end of the Center Feed Pipe as before, stopping short of the final marked position.
Use CPVC joint compound and apply a moderate amount of glue, all around the pipe just behind the marked positioning line.
Continue installing Clip Nut Seat until it is up to, but not on, the marked positioning line. This is the same position as established during the test fit. Allow at least 15 minutes to set. (Without this gluing step, these threads would be a potential leak path to the outside of the filter press. The leak would appear behind the Lock Nut during operation.)
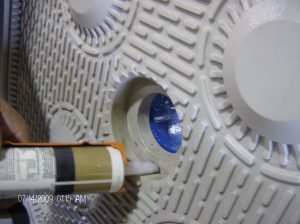
Step 3) Seal The Gasket
Apply NON-Silicone Sealant to the Filter Press plate center feed tube hole, as shown.
Install the Gasket
Apply sealant to the outer side of the Gasket.
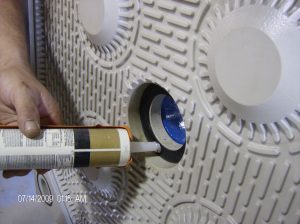
Step 4) Install the Center Feed Pipe Assembly
Install the Center Feed Pipe and glued nut into the filter press plate.
Hold the outside (side “A”) of the center feed pipe and install the outer Lock Nut.
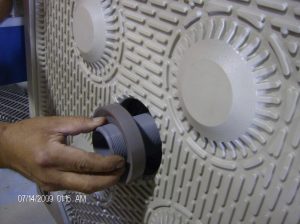
Step 5) Tighten the Assembly
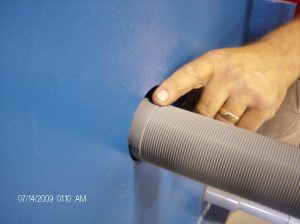
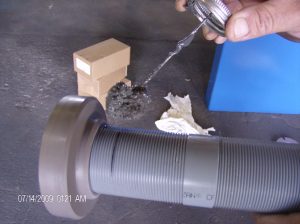
Tighten firmly by hand, or with a spanner wrench if necessary. Rotation of the pipe and glued nut is suggested to ensure even silicone discernment.
Clean off any squeeze out from the inside of the Pipe assembly.
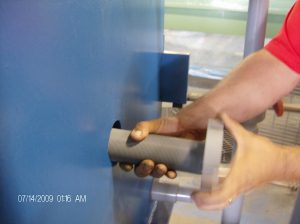
Step 6) Final Step
Reinstall the cloth to the head plate (cloth not shown for clarity) and then the install the Clip Nut over the cloth. The Clip nut is used to hold the cloth in place. The spanner wrench, shown above, or similar should be used to tighten this nut.
The new Center Feed Pipe Assembly is now installed and ready to be reconnected to the ball valve feed from the diaphragm pump.